My opinion of the Tailfin Aeropack varies greatly depending on what I compare it to:
- The Aeropack could be compared to a bikepacking-style seatpost-mounted rear bag, in which case it has many advantages including better stability, bag access and fitting on smaller frames.
- The Aeropack could instead be compared to a conventional rear rack with a rack-top bag, in which case it offers a more integrated, lightweight and sleeker design that fits on a wider variety of frames, but there are many compromises to practicality. It’s a good option for a bike where it’s not possible to mount a conventional rear rack, but it’s disappointing that the Tailfin doesn’t offer the practical features of a conventional rack.
This review is therefore divided into two parts, one for each comparison, but I first start with an overview of the brand and the product. There is also a more general page about Bikepacking Bags, Fenders & Locks.
Tailfin
Tailfin thought outside the box to develop novel methods of attaching luggage to bikes. They started by offering a super-lightweight rear rack and side pannier bags (review of the pannier bags coming soon) that could be attached to almost any bike and now they’ve added the Aeropack rack-top bag to the range (reviewed here) to provide a more aerodynamic way of carrying equipment.
The Tailfin rack mounts to the bike by clamping onto a special rear axle and around the seatpost. There are various versions of the rack that offer various advantages and different mounting kits are available for different axle types and versions. The seatpost clamp fits almost all seatpost shapes and sizes. The Tailfin website does a reasonable job of explaining the differences and they’ve made some in-depth videos, so I only briefly touch on these aspects. The Aeropack bag itself remains the same across all of the attachment options.
The Tailfin products that I’ve tested are well-engineered, well-made and function as intended. They also easily meet their design goals of offering the lightest-weight solutions within their categories and they look like high-performance equipment. I was therefore pleased to spend some time putting their bags through some real-world usage.
The Tailfin Aeropack compared to a bikepacking-style rear bag
For brevity, I refer to bikepacking-style bags that mount to the saddle and seatpost as simply seatpost bags. Seatpost bags have become popular not only among people doing the bikepacking races that they were developed for, but also with people doing more relaxed touring because they fit easily on most bikes and are lightweight. However, they do have several downsides:
- They can be fiddly to mount and unmount from the bike.
- They can move around a lot while riding if the bag isn’t packed well or the straps aren’t properly tightened.
- They do not fit well on smaller frames and many don’t work with dropper seatposts.
- They are not so convenient for getting items in and out of quickly or keeping things organized because of their top-access roll-up closure and single compartment.
Several newer, more advanced seatpost bags incorporate structures to support the bag and some allow an easier method of mounting and unmounting the bag. Even so, the limited access to the items inside and the adjustments needed to keep them stable make them a non-starter for me when contemplating what bags I want to use, especially in a race situation where any time that can be saved off of the bike is far more important than a marginal increase in equipment weight – time efficiency almost always trumps weight loss when trying to optimize overall speed. I’ve found seatpost bags to perform poorly in terms of time efficiency.
The Tailfin Aeropack goes a long way to overcoming the disadvantages of seatpost bags. Mounting and unmounting the Aeropack from the bike is far better than most seatpost bags and there is absolutely no movement when riding. It fits reasonably well on small frames and can be used with a dropper post.
The Aeropack has a wide roll-top closure that is large enough to allow complete access to the bag’s contents, making it far better than the narrower opening at the top of seatpost bags. In addition, the Aeropack has a side-access zipper that gives entry to the main compartment without undoing the clips, which is a major bonus. There is also a small side pocket. Bag access and organization is therefore a major improvement over regular seatpost bags, but not as good as other rack-top bags, which I discuss further below.
The three downsides of the Aeropack compared to a seatpost bag are that the Aeropack and rack are heavier than a seatpost bag, they are more expensive, and they are often not as simple to move to a new bike because a different axle may be needed.
Overall, I rate the Aeropack as a massive improvement over bikepacking-style seatpost bags. However, a seatpost bag has never been my preferred method, so I now compare the Aeropack to the luggage setup that I find to be the most practical.
The Tailfin Aeropack compared to a conventional rear rack and rack-top bag
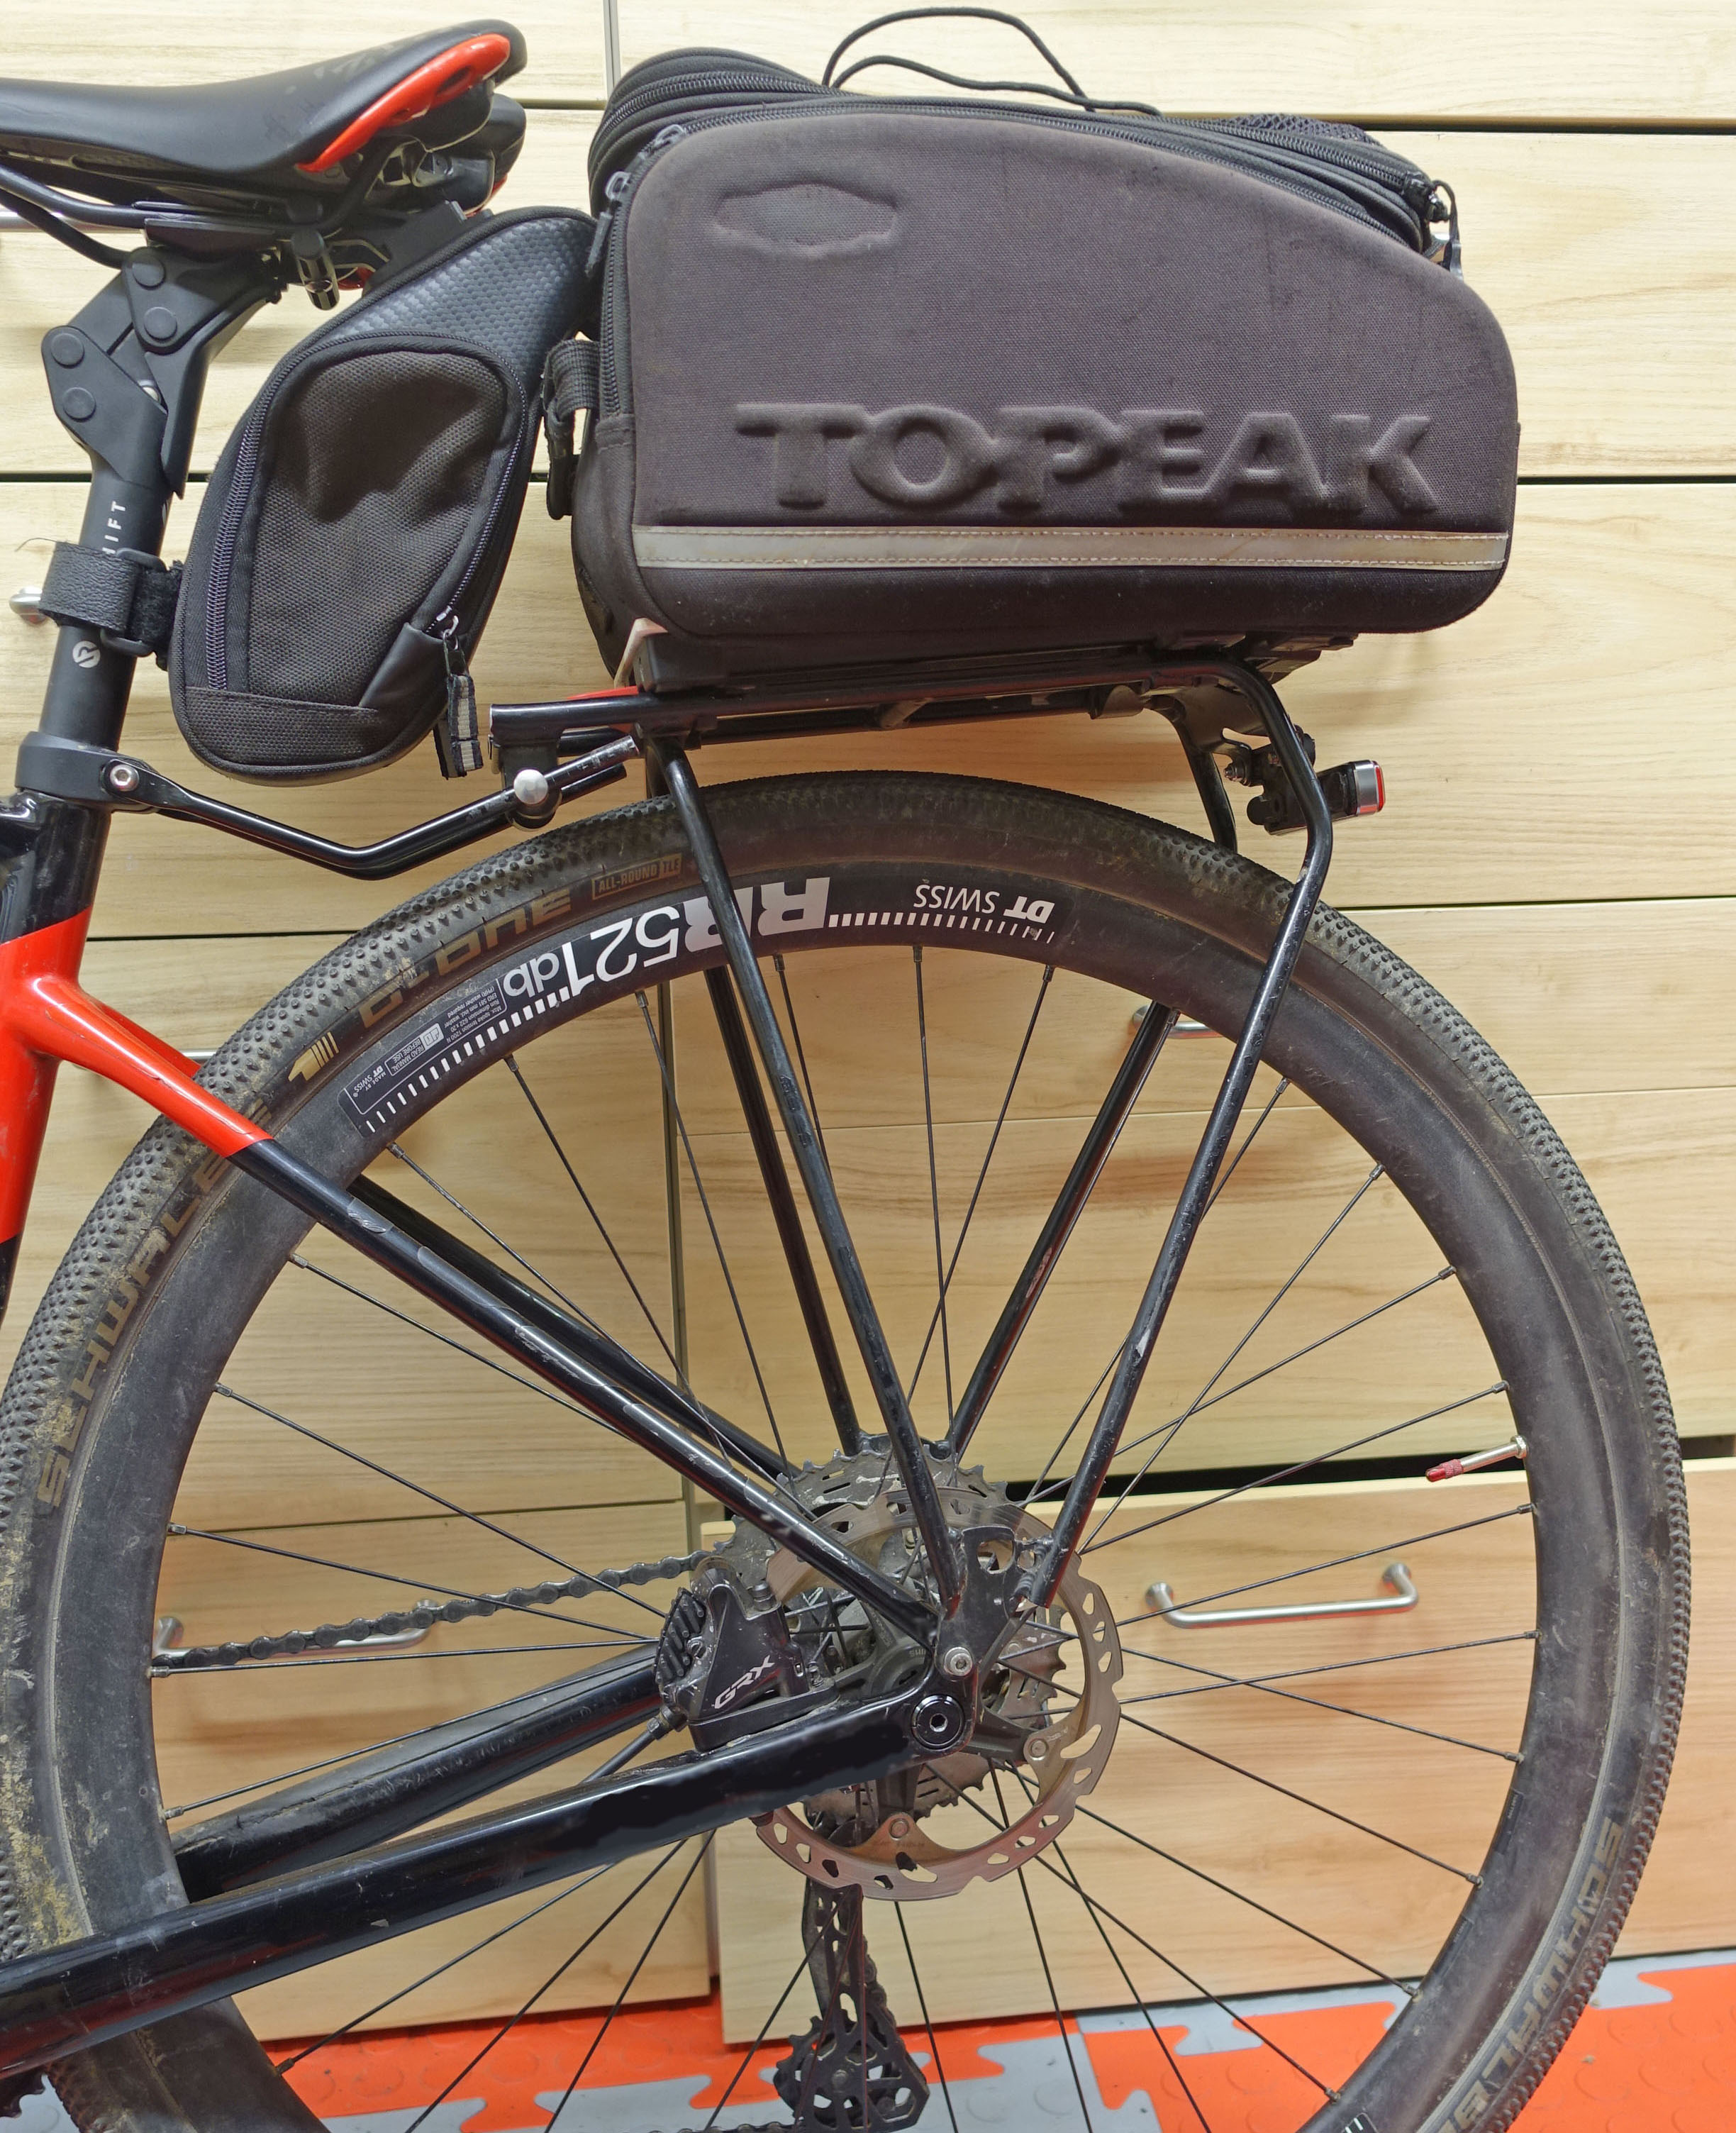
Rather than being designed for performance, conventional rear racks and rack-top bags are more utilitarian and practical and so are an uncommon sight on the start-line of self-supported ultra-distance bike races. Even so, I prefer this setup even when doing events like the The Transcontinental Race because I find it to be the most time-efficient and organized method of carrying equipment while still being respectably light and reasonably aerodynamic. This setup allows me to waste significantly less time off of the bike, which more than makes up for the marginal difference it might make to cycling speed.
After using rack and bag systems from RackTime and Topeak, the best bag I’ve found is the Topeak MTX Trunk Bag DX (Topeak, Amazon. I prefer to mount it on a RackTime LightIt rack (RackTime, Amazon), so I’ve replaced the bag’s Topeak mounting plate with a RackTime SnapIt plate. KlickFix and Ortlieb also offer similar rack and bag systems.
I had hoped that the Aeropack would allow me to improve upon my current setup by being a lighter, more integrated, sleeker and more aerodynamic option than a conventional rack and bag while maintaining the practical aspects. It satisfied all of the former criteria, but too many practical features are missing from the Aeropack and rack.
Many people won’t see this comparison as being appropriate because it’s often not easy to mount a conventional rack on higher-performance bikes. I plan to write a separate article on what racks and adaptors can be used to mount a rack on a frame without attachment points and what rack-top bags are compatible with them, because various options do exist. Here I focus on how the Aeropack compares to this genre in general and try to avoid too many specific comparisons.
Closure, pockets & organization
Most rack-top bags have a semi-rigid structure and a zippered top opening. For weight savings and to make it fully waterproof, the Aeropack has a more flexible structure and a roll-top closure, making it more similar to a seatpost bag.
A zippered opening is far easier to operate and can be done with one hand, whereas the the roll-top closure of the Aeropack has two clips, each of which requires two hands, and one of them is awkwardly positioned behind the seatpost.
As mentioned above, the side-access zipper on the Aeropack gives entry to the main compartment without undoing the clips, which is useful but it’s not big enough to give complete access. I used it to quickly stow small items, but it was frustrating that such items ended up in the main compartment instead of in a separate section, because I ended up using that entrance like I would the large side pockets of my Topeak bag.
Combined with the bag material and seam welding, having a roll-top closure allows the Aeropack to be 100% waterproof. Bags with zippered top openings keep rain out during short, light rain showers but a rain-cover needs to be added to survive major storms. I find the very occasional addition of a rain-cover is far less of an inconvenience than is frequently needing to open and close a roll-top closure and I’ve never had problems with water ingress despite riding through some pretty crazy weather.
The roll-top closure of the Aeropack does make the volume of the bag expandable, but many zippered rack-top bags have zippers that can be opened to expand the volume and/or elastic cords and mesh panels to hold items on top.
In summary, I very quickly became tired and frustrated with the Aeopack’s roll-top closure, the side-access zipper often didn’t solve the problem and the single side pocket was far too small.
Bag position & access
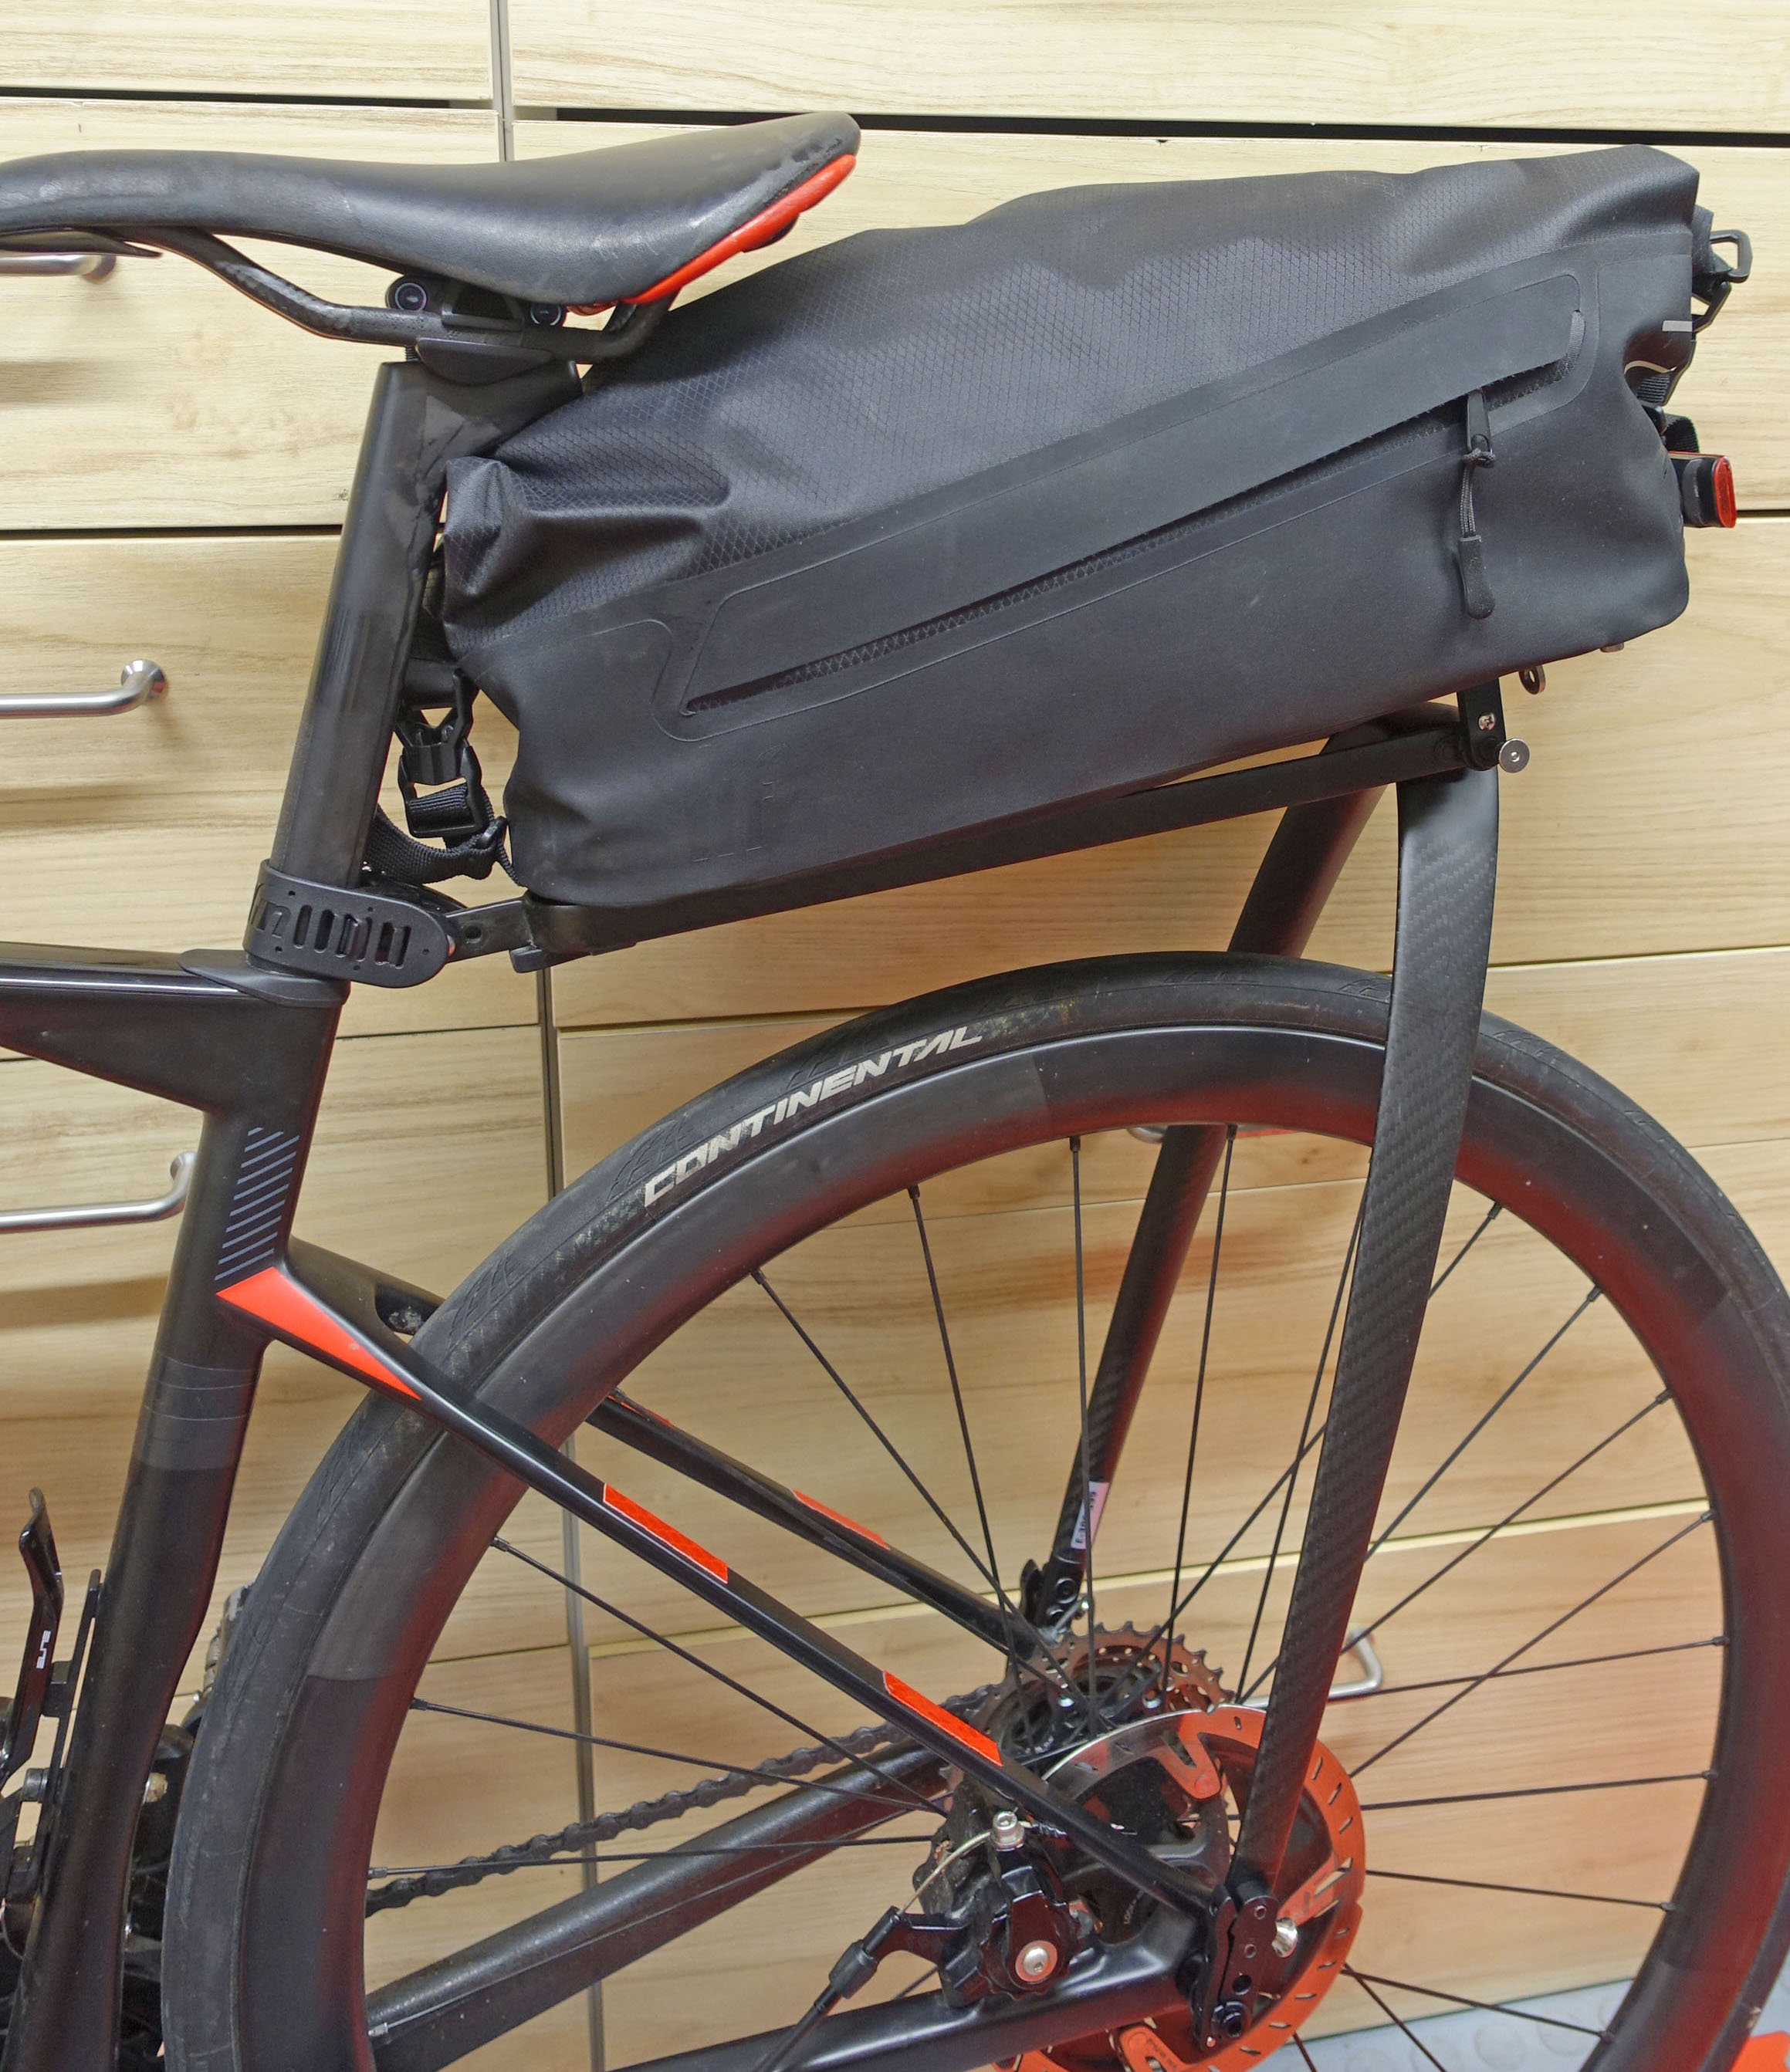
The Aeropack is positioned directly behind the seatpost. This mimics the position of a seatpost bag and should keep the setup as aerodynamic as possible by hiding the bag behind the rider. Unfortunately, this reduces access to the bag because one of the clips is behind the seatpost and with a saddle that is not particularly high (I have a 70cm saddle height), it blocks access to the front part of the bag.
I also had problems with the bag rubbing my thighs when pedalling. I fabricated a new mount to place the rack about 2 cm lower and 1 cm further back but when I didn’t close the bag in the right way or didn’t tuck the clip away properly then my average-size thighs still annoyingly rubbed the bag’s closure on every pedal stroke.
When using a conventional rack and rack-top bag, the bag is positioned well behind the saddle, so access is unhindered and it’s nowhere near the rider’s thighs. Such a setup has a further organizational advantage in that a saddle bag can be put in the space between the seatpost and rack-top bag. Saddle bags are designed for that location and so are accessible from the side and are a perfect place to keep tools and spare parts, these items then don’t take up space in other bags and can always be left on the bike and forgotten about until needed.
Tailfin now recognize that some riders need to mount the bag further back and so they sell a longer version of the mounting bracket to move the bag backwards by 5 cm. Unfortunately, the extended mount only works on the “rigid seat pack” version of their rack (see below), which I don’t have. In addition, 5 cm would be enough to avoid the bag touching my thighs but would not really be enough to prevent the saddle from blocking part of the bag access and it also wouldn’t allow enough space for a toolbag.
Bag removal & mounting
I mentioned in the introduction that there are different versions of the Tailfin rack, and one of the major differences is in how the Aeropack is mounted and removed:
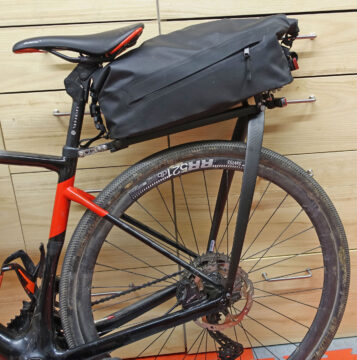
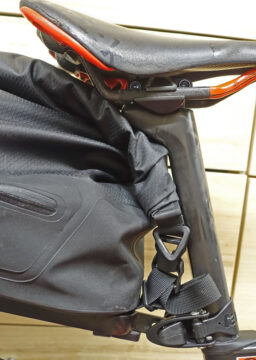
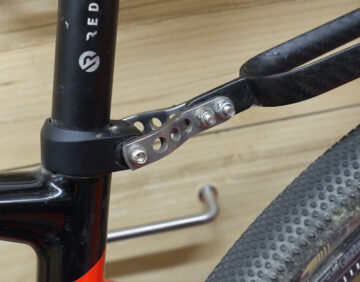
- The “rigid seat pack” version eliminates the top part of the rack and uses the Aeropack’s internal frame instead, so this is the lightest-weight option. The entire rack and bag remain as one and are mounted and removed together and fold up: First two supporting struts are clipped onto the special wheel axle and then the front is strapped around the seatpost (see photos to right and above).
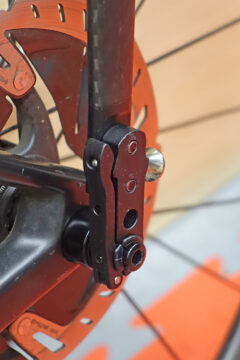
- With the “pannier rack” or “trunk rack” version, the complete rack remains attached to the bike and the bag unclips from it, making it more similar to conventional racks, so this is the option that I chose. When mounting, the front of the bag is hooked into the rack then two small pins under the rear of the bag are clipped into the rack (shown in the photo of the light mount below).
Both systems have been well-designed, function well and provide a totally rigid attachment. Unfortunately, both Aeropack mounting systems are more fiddly than most other rack-top bag systems. The RackTime and Topeak systems both use spring-loaded clips that click in automatically when the bag is slid onto the rack and a large plastic button is pressed to release them – this can often be done with one hand while holding other items and it takes less time than does either of the Aeropack versions.
Just as the roll-top closure caused access to the bag and re-closure to be annoyingly slow, the more awkward method of bag removal and mounting quickly annoyed me and I felt like the bag was again costing me time that I could have spent riding.
Compatibility with other accessories
The Tailfin rack is vastly inferior to a conventional rack when it comes to combining it with other accessories. I’ve already mentioned that the forward mounting position of the Aeropack doesn’t leave space for a saddle-mounted toolbag. In addition, the options for mounting rear lights and fenders/mudguards are not as good with a Tailfin rack as with a conventional rack.

Tailfin offer light mounts that bolt onto the base of the Aeropack bag, plus lights can be clipped to straps on the rear of the bag. Although this is a better option than with many seatpost-mounted bikepacking bags, it is far from ideal. A more practical solution would be to have a light bracket that remains on the rack rather than being fixed to the bag. This would be almost essential when using a rear dynamo light because you wouldn’t want to disconnect the wires every time you removed the bag (and possibly forget to reconnect them every time you put it back on). Even with a battery-powered light, having the light mounted to the bag is inconvenient because the bag rests on the light when not attached to the rack (although this wouldn’t be the case with the “rigid seat pack” version).
I prefer to use fenders/mudguards when riding long distances to prevent being drenched from below during and after it rains and to keep my legs and the bike cleaner when riding on dusty or dirty roads. When using a conventional rear rack, I attach the rear fender directly to the rack to provide a more solid and often lighter fixing than using separate fender stays. Exactly how I do this depends on the rack, but unfortunately I was unable to find a way to do so with the Tailfin rack.
Summary
The Tailfin Aeropack bag overcomes most of the disadvantages of a bikepacking-style seatpost-mounted bag and from that perspective I would highly recommend it. It’s well made, uses good quality materials, is lightweight, and attaches to almost any bike.
However, I found the Aeropack bag and rack far less practical and more awkward to use than a more conventional rear rack and rack-top bag. Personally, I’d like to see various design changes that move the Aeropack more towards being a practical rack-top bag system and away from only being a more stable version of a simple and lightweight rear bikepacking bag.
Dear Chris,
many thanks for this review, all the other reviews and information you provide on your website! This was/is so helpful for me!
I just came back from a trip with a Tailfin Aeropack and would like to share my experience with the bag. I own the „rigid seat pack“ version of the Tailfin Aeropack with the longer version of the mounting bracket. You can see a picture of my setup here: https://www.strava.com/activities/3857997363 In comparison to a seatpost bag I see the Aeropack as a great improvement.
I also have some experience riding with a rear rack and a rack-top bag, specifically the Arkel TailRider (but without a mounting plate). Therefore, I concentrate my comparison of the Aeropack with this TailRider setup.
Closure, pockets & organization:
Opening/closing of the roll-top closure on the Aeropack is slower than using the zippers on the TailRider. Because in my setup the Aeropack is positioned much further back than on your bike, I have no issues with closing the clips. But you still need both hands to open/close the Aeropack and, therefore, a stable position for your bike. This is a disadvantage. On the other hand, because of the roll-top closure the Aeropack is much more expandable than the Tailrider. And if this is not sufficient you can still attach stuff on the top of the bag with the included straps. I really like the expandability of the Aeropack.
Bag position & access:
No rubbing of thighs for me (with the longer version of the mounting bracket). I probably could even attack a small seat bag on the seatpost but this would interfere with accessing the front closing clip of the Aeropack.
Bag removal & mounting:
I do not find removing & mounting the bag overly fiddly. Takes 15 seconds. Definitely much faster and less fiddly than attaching the TailRider with the velcro straps on a rear rack. Probably more fiddly and slower than using a rack-top bag with a mounting plate but a mounting plate requires a DIY project in most combinations of rear racks and rack-top bags.
Compatibility with other accessories:
I am using a dynamo light that is attached to the seatpost. Of course, this is useless when the Aeropack is attached. However, I do not want to attach the dynamo light to the Aeropack. This would make it too complicated to change between a setup with bag and without bag. I clipped a battery-powered light to the Aeropack and this worked well for me.
I am using fenders with fender stays. I do not see any need to attach the fenders to the Tailfin rack. This would also have the disadvantage that it would complicate the conversion of the bike setup into a setup without bag and rack.
All the best, Jochen
Thanks Chris and Jochen for sharing your detailed insights. Great to see this level of detail from 2 detailed bike packing riders.
I was looking to see if anyone had reported rubbing the backs of their thighs/legs on the aeropack. As you made clear for the alloy or carbon rack that does not have the integrated aeropack there is no accessory you can purchase to increase the space between the aeropack and the seatpost but if the aeropack is permanently integrated with the rack then you can buy the accessory. It seems an oversight by TailFin they do not provide this accessory.
I totally agree. I keep fabricating different extensions to use the rack on various bikes in combination with other parts and bags, but it would be far better if Tailfin sold extension brackets that moves the rack rearwards by about 10 cm, with a model for each version of the rack.
Hello,
what axle do you use for your bmc?
I don’t know, I measured it and ordered the appropriate one for the length and thread pitch. I wouldn’t trust anyone else’s measurements because bike brands can change stuff like that whenever they feel like it, even mid-model year of the same model (although that is rare). Definitely measure twice, order once.