I’m heading to Ireland next week to take part in the TransAtlantic Way race, which starts in Dublin on June 7th, 2018 and then follows the west/Atlantic coast for a total distance of about 2,300 km. I’m looking forward to ocean views, small lanes, lots of short, sharp climbs, maybe some wind and rain, and some pretty long daylight hours.
I know several of the other people in the race, so I’m looking forward to catching up with some old friends and making lots of new ones. You can follow mine and everyone else’s progress on the TrackLeaders page, or their will be a new site ready for the race called DotWatcher that should be a lot more user friendly and integrated.
The Bike
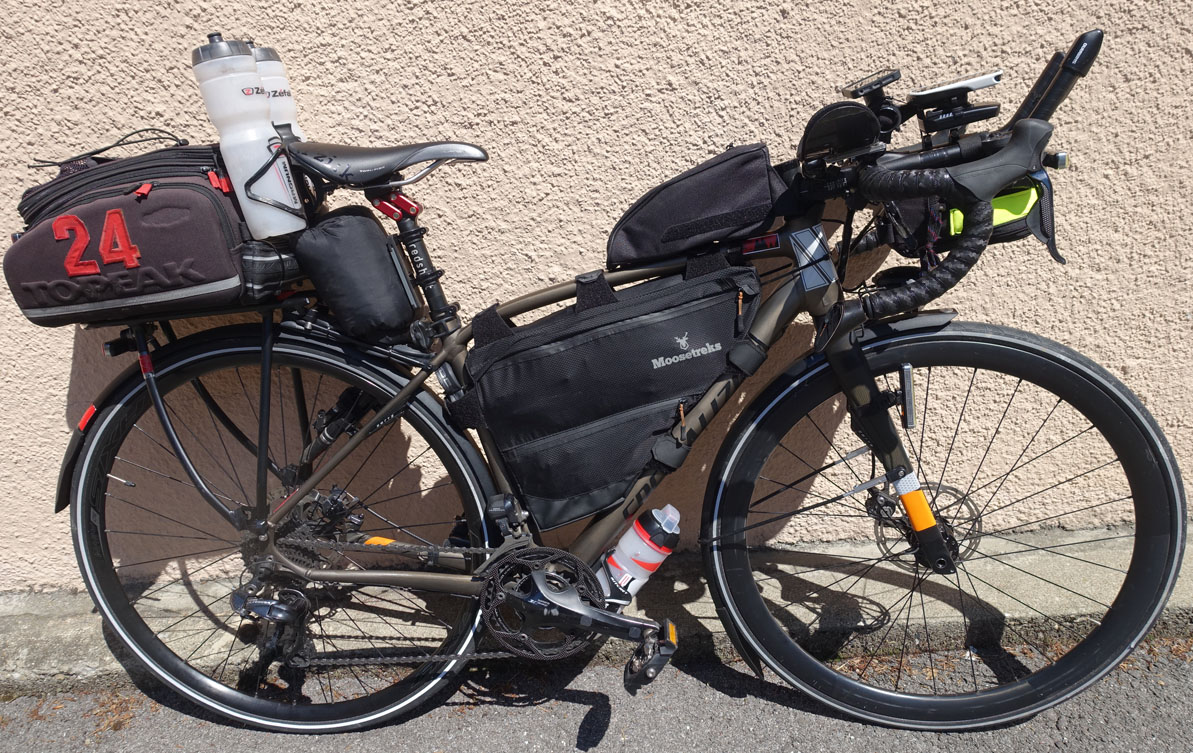
I’m using a different bike than the two that I used for the TransContinental Race in 2014-16, so here is a brief overview. As always, I’ve modified and customized most of the components and accessories to make this a very unique and personalized machine. Click on any of the images to see a full-size version.
Frame & fork: Specialized Diverge 2015. It’s an aluminum frame with a carbon fork. I’m fortunate to also have a more recent carbon Diverge with the FutureShock suspension in the front fork, but that has a creak in the bottom bracket that I can’t get rid of even after changing many parts. The older, aluminum Diverge is as comfortable when using the RedShift ShockStop stem (see below) and has a couple of other very minor advantages, so I’ve decided to use it for the race.
Drivetrain

Gear ratios: 42-26 TA Specialites chainrings on a Shimano 105 triple crank. Shimano 11-32 11-speed Ultegra cassette. I have a chainring guard to keep my legs clean, prevent chain derailment and increase safety (I already have a scar from a chainring that took a chunk out of the back of my ankle).
Derailleurs: Ultegra Di2. Flawless and effortless shifting even with non-standard gearing combinations.
Gear controls: Dura Ace gear levers with buttons to control the Garmin Edge computer (using a wireless transmitter). Extra controls: bar-top (“climbing”) shifter and aerobar shifter for the rear derailleur. MTB junction box with gear and battery display. Two internal batteries, both inside the seatpost, the wire from either can be plugged into the system. Spare parts: wire and junction box.
Other Components
Braking: Shimano CX77 mechanical disc brakes, 160mm rotors. I prefer mechanical disk brakes because when they are setup well with good cable housing, they work almost as well as hydraulic brakes, are far easier to adjust and repair, and make it possible to have an additional bar-top mounted brake lever. Spare parts: Two pairs of pads.
Tires: Continental 4000SII Reflex. Nominally 25mm front and 28mm rear, but they measure 27mm and 31mm, respectively. Standard-weight inner tubes (I’ve tried tubeless tires, but found that punctures were still possible and they were a lot more hassle to live with). Spare parts: 3 tubes and a 25mm tire.
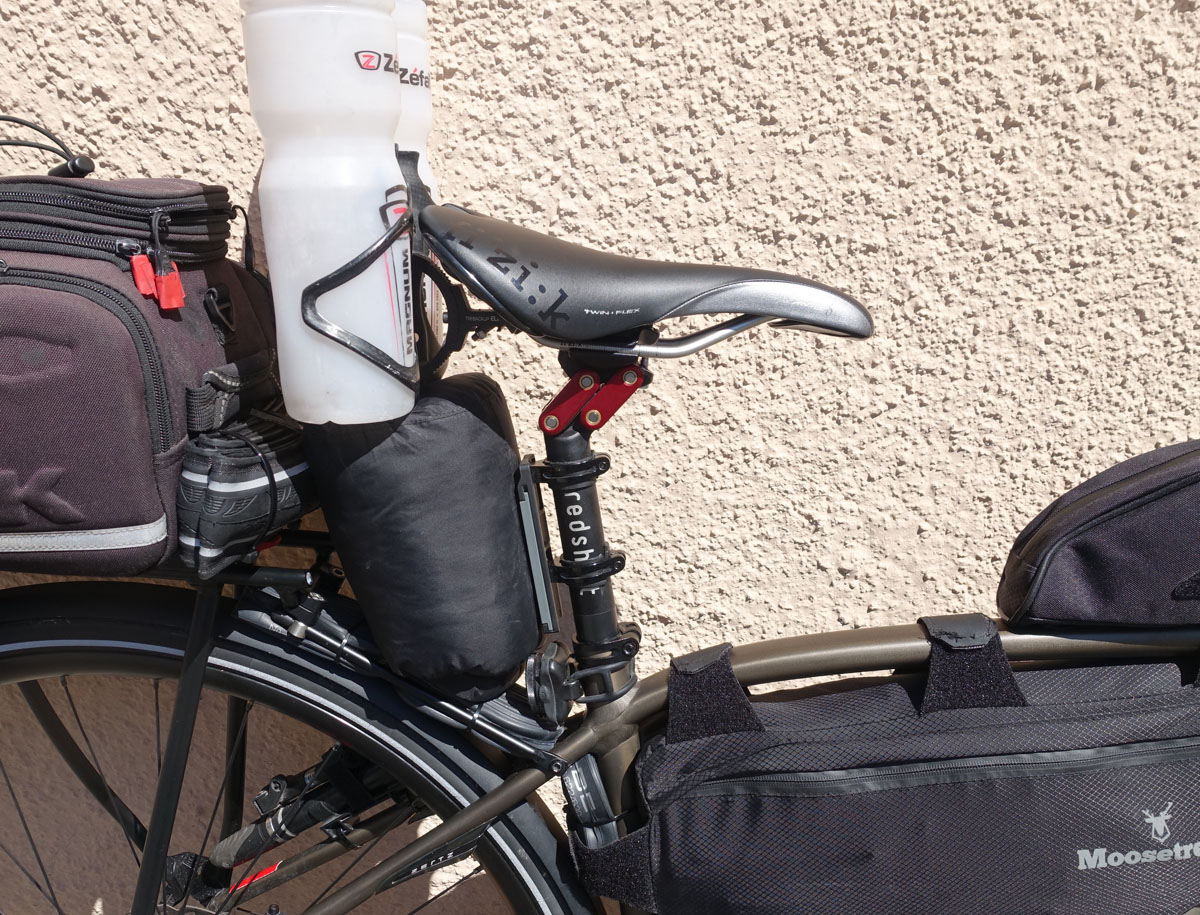
Saddle & seatpost: The Fizik Aliante saddle is an older-generation version that works great for me. The RedShift Dual-Position seatpost allows the saddle to be moved forwards by 5 cm while riding to give a more open hip angle when using the aerobars (see my full review). The saddle is in the forwards/aerobar riding position in the photo on the right and in the standard position in the full bike photo above.
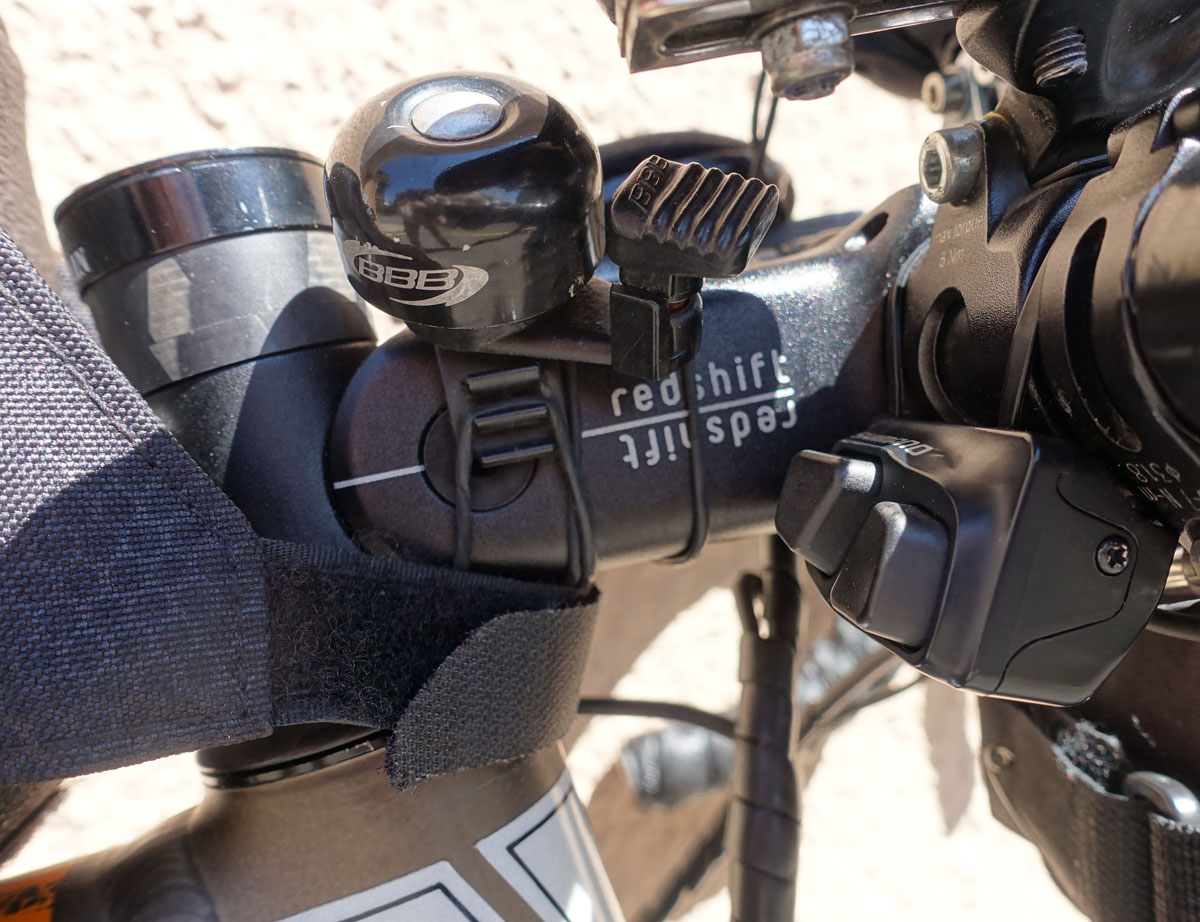
Stem, handlebars & bar-tape: The RedShift ShockStop stem is excellent at absorbing shocks and giving a smooth ride (see my review). The Ritchey EvoCurve WCS alloy handlebar has a wide 31.8 mm clamping zone for aerobars and accessories plus a flattened top section for improved comfort. Comfort is also ensured by the Lizard Skins DSP 3.2mm bar tape.
Aerobars: 3T Flip Clip On, with the Comfort model of the elbow pads and custom mounts to move the pads further behind the bars. Being able to move the pads out of the way to access the bar tops makes a massive difference for me.
Accessories
Mudguards/Fenders: Portland Design Works Full Metal Fenders, which are far more solid than any plastic models and are still reasonably light. Staying dry and clean is a massive benefit for comfort.
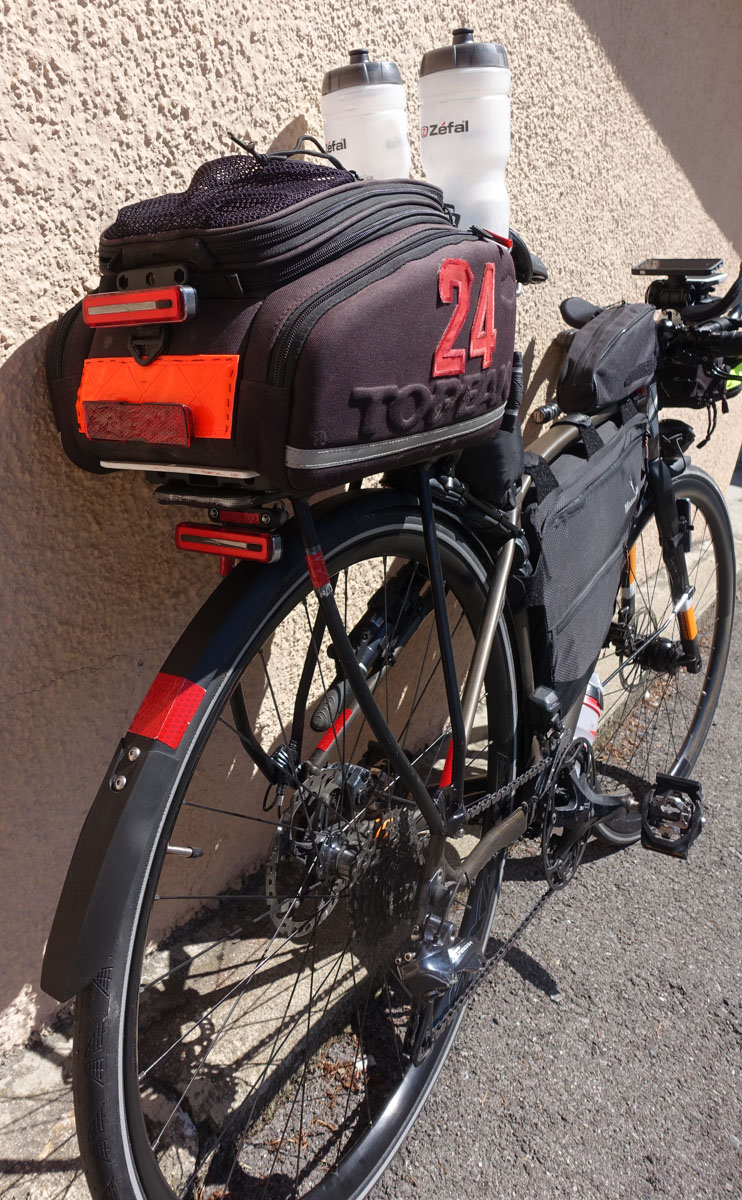
Rear bags: The rack-top bag is a Topeak MTX Trunkbag DX with the Topeak mount replaced by a RackTime mount. I prefer this to a saddle/seatpost mount bag because the rack-top bag clicks on and off the rack in a second, is totally stable, everything inside is easy to access and organize, and it allows me to put a drybag containing my sleeping bag behind the seatpost. The drybag is mounted using a Topeak QR CageMount that makes it easy to remove.
24: This was my race number for three editions of the TransContinental Race (2014-16). I’ve left it on the bag because it brings back good memories.

Water bottles: Two 1000 ml Zefal Magnum bottles behind the saddle using a Topeak Tri-Backup Elite mount and Arundel Mandible cages. One 750 ml Elite SuperCorsa bottle under downtube with mud cover.
Frame bag: MooseTreks frame bag that I found on Amazon and is a perfect size for my frame after modifying some of the straps.
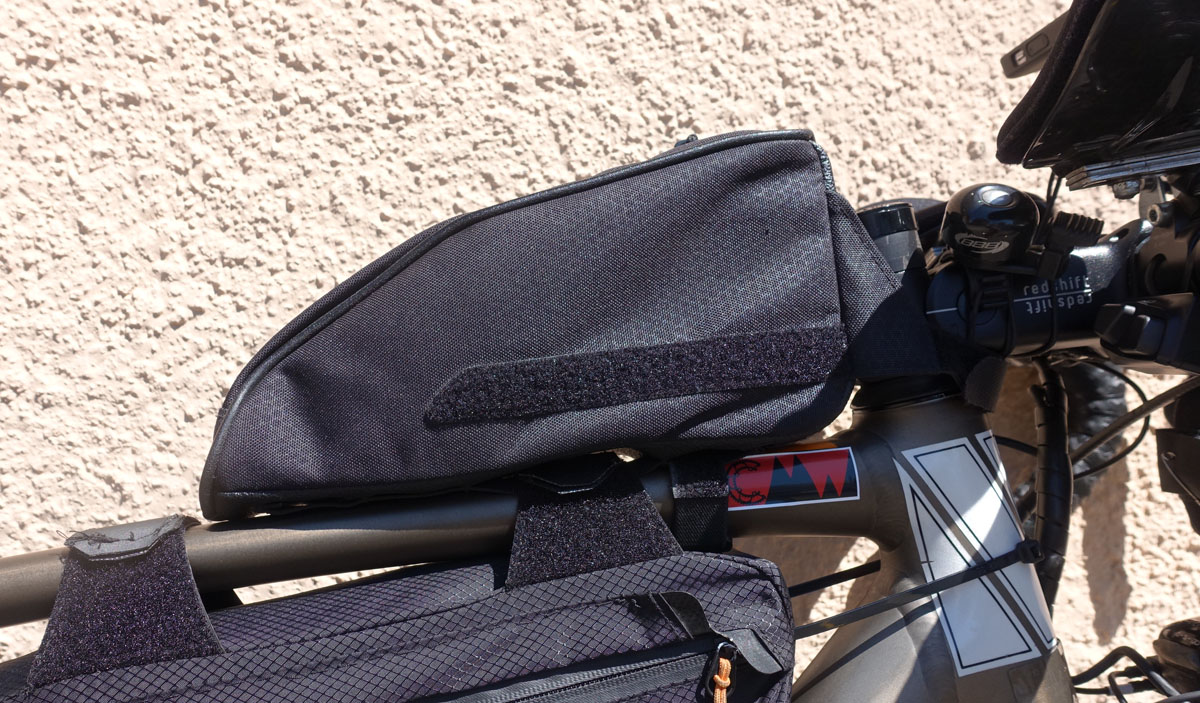
Top tube bag: Topeak Toploader. Large, inexpensive, and the new version has a far better zipper than the previous generation of the bag, which had been it’s only weak point.
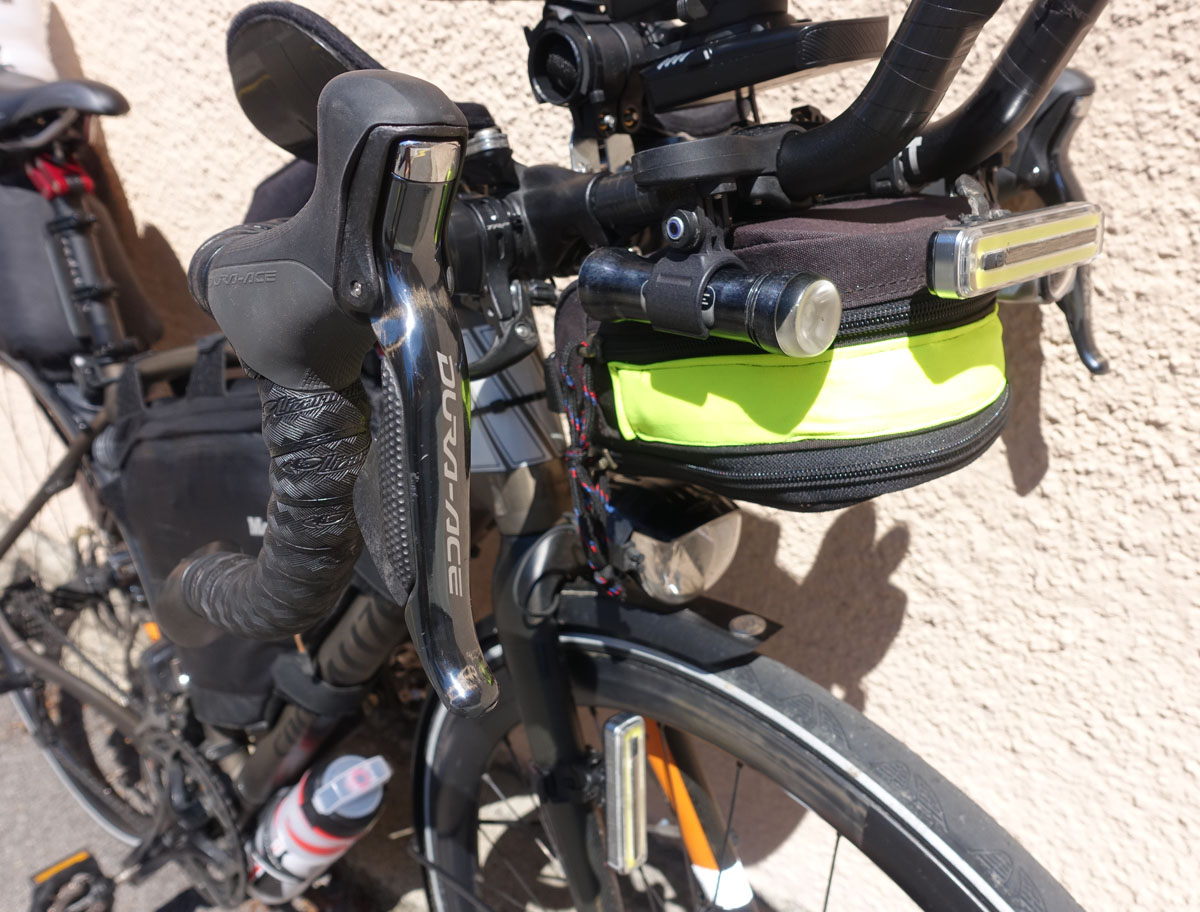
Other bags: I dug through my box of saddle bags to find something that would fit under my aerobars and found an old Trek model that fits well and carries some of my rain clothes (see photo below). I also added a strip of fluorescent material because the race rules require to have something and I dislike wearing such colors.
Lights & Electronics
Primary lights: SON dynamo hub with B&M Luxos U headlight. Rear dynamo light integrated into the rear rack (Racktime Shine Evo Light). I use Di2 wires and junction boxes, with re-soldered connectors because I find the standard dynamo wiring to be too primitive and the connectors very fragile.
Backup headlight: I have an Exposure Sirius front light that I can mount on the aerobars or on a helmet mount to give more light on any fast, twisty sections and use in case of dynamo failure.
Flashing lights: Two Moon Nebula front lights and two Moon Nebula rear lights. These are very bright and have good battery life. I normally only use one at a time and keep the second as a reserve. I also have a Lezno Zecto Pro front/rear reserve light (I’ve done races in which 3 rear lights have failed before reaching the finish).
Safety equipment: Multiple reflective stickers. Flourescent patches sewn to front and rear bags. Pedals with integrated reflectors. Tires with reflective sidewalls. Bell (mostly used to warn pedestrians on shared-use paths). Rear-view mirror (can be useful in specific road and traffic conditions, but I don’t use it that much).
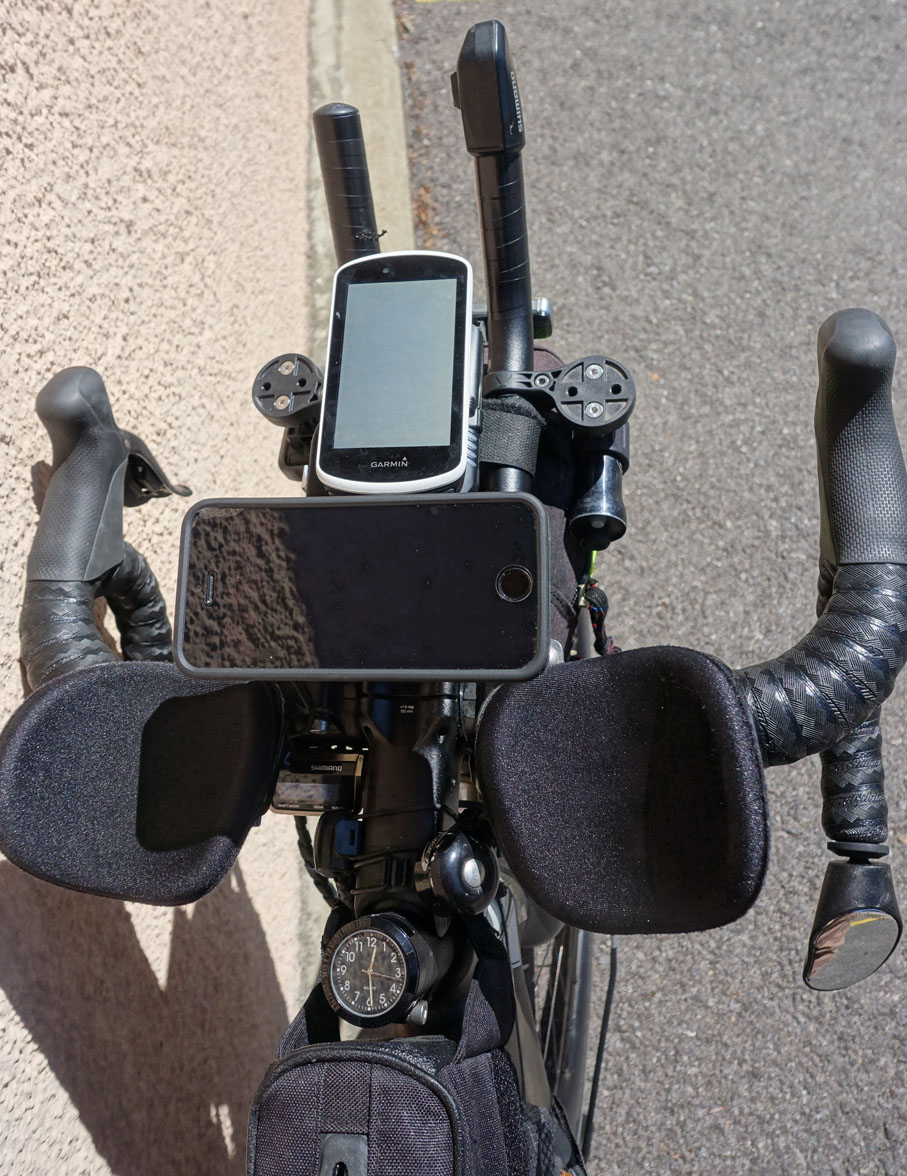
Navigation: The Garmin Edge 1030 has the best screen and excellent battery life, especially with the external battery. Due to the external battery, I had to create a special mounting position. My backup navigation is a Garmin Edge 800 in my bag and an iPhone SE on a QuadLock mount (using the maps.me app). There’s also a StemCaptain clock mounted in the top of the steerer.
Weight: Total weight is about 20 kg without food or water. Typical weights for bikepacking setups are around 15-18 kg and some people have only around 12kg. I’m at the top of the range and I could push it to be a couple of kilograms lighter, but I prefer to be prepared and comfortable in most conditions and situations rather than being more lightweight.
Expectations
This is my first bikepacking race since the 2016 TCR, so I’m really eager to get going. I’ll be pleased if I can average at least 300 km per day, but that may be tough with the challenging terrain, so I’ll be adjusting my goals as I go. I’ll try to upload my rides to Strava, make some posts on my Facebook page, and again you can follow me via the satellite Tracker page.
Good luck on your ride!
One note in regard of the dynamo connectors: I was unhappy how fiddly the connection to a SON dynamo was (especially in comparison to my Shutter Precision dynamo) and went to my LBS. They had just gotten a new connector from Schmidt that probably will solve the fiddly part and be better suited for some roadside tire change.
Thanks for the advice. I also managed to find some connectors that were just the right size for the SON this time – not too tight or too loose, so I don’t mind those (on a previous bike, my SON connectors were far too tight). It’s more the fiddly and fragile ones that connect to the lights that I dislike most and which I’ve replaced by having a friend solder Di2 wires directly onto the headlight’s internal circuit board, then having Di2 junction boxes taped to the outside of the headlight.
That’s a very busy looking bike! Is there room for you in there? 😉
Didn’t mention the whheel set up.
Good Luck, weather in the U.K. has been very hot.
Thanks. The front hub is a SON, 15mm thru-axle, 28-hole. The spokes are DT Swiss Aerolite. The front rim is a carbon model from BDop Cycling, who keep the cost reasonable by selling direct from Asia. The rear wheel that I have with the same rim doesn’t fit on this bike because of the axle. I therefore used the Axis (Specialized) rim that came with the bike because it has 28 holes and offset drilling and re-built it with a Shimano CX75 QR hub and DT Aerolite spokes again.
Hi! This looks great!
Can you clarify what you are mounting your smartphone mount onto? Is hard to tell on the photos but it’s clear it’s beyond the stem… Some aero Bridge perhaps?
Also what do you do with your phone when it rains? Isn’t it rather exposed to the elements? I prefer your setup to my rather naff looking topeak bag thing – but I put up with it because it is rainproof.
All the best Oliver
The smartphone and Garmin mount is entirely custom-made and I used various parts that I found in my drawers. A friend wants me to make one for him but I can’t even find the same parts again to make a second one and it is really custom-made to work specifically with my stem and aerobar setup.
My main motivation for making the mount was having somewhere to put the Garmin Edge 1030 mount that allowed the external battery to be mounted underneath, while not interfering with my aerobar setup. I then realized that the support that I made for the Garmin bracket could also be used to put a Quad Lock phone mount on. The Quad Lock phone case comes with a rubber cover to protect it from splashes, but any sign of real rain and the phone goes inside a waterproof pouch inside a bag – my phone is certainly not essential when riding, but is simply sometimes useful to have close by.
Hi Chris – thanks so much for your detailed reply. I must say your fantastic website information has done more for my cycling than anything else. BTW I really like like your racktime / rackbag set up here – I emulated it on my genesis cdf – a great enhancement to quality of life
One other question – can you clarify what width mudguards are you using here with your 28mm tyres? ( I get obstructive mud buildup on my mudguards in the winter on tracks here in Norfolk due to clayey soil and have yet to find the right setup, as clearances seem too limited)
All the best
The fenders were Portland Design Works. I’m guessing they were the 37mm width, but they may have been the 45mm, I have some of each size. My family lives in Essex, so I’ve experienced the clayey soil buildup – nasty stuff, which I always try to stay away from.
Hi Chris,
Your website is very interesting and useful !
Based on your description, I built a granny crankset wich same us in your bike, 105 tripple crankset with twoo TA chainrings (middle 44/inner 28). My problem is that if the chain in the 28 ring the chain touches to the 44 ring while using the rear 11-13-15-17-19 sprockets. It seems this is a chainline problem, but it is interesting when I build with the original Shimano 30/39 chainrings this problem there isn’t.
Did you have a similar problem ? How can I solve it ?
I’m glad that my setup has inspired you. Unfortunately, I’m not surprised by the chainline problem but there are several ways to improve it.
The chain interface is worse with the 28-44 rings than the original 30-39 rings because the larger difference in ring size means that the chain can touch the middle ring at a much earlier point. Also, the Shimano rings are shaped slightly differently to the TA rings; in particular the Shimano 30-tooth inner ring is slightly offset to the inside while the TA ring is flat. I therefore put some thin spacers between the inner ring and the mounting posts – doing that should improve things quite a lot already.
Another method is to play with the spacers on the crank axle. A Shimano triple crank has a 3mm axle spacer behind the left crank. If you can find other spacers that have a 24mm internal dimension then you can remove the 3mm spacer and put 2mm of spacers on the left and 1mm of spacers on the right. You can even keep the 3mm spacer on the left if you can only find a 1mm spacer for the right – the left hand crank will still clamp onto the axle without any problem. I did this on one bike to get the double front derailleur to move in far enough for good shifting, but finding the right spacers took a while. If you’re worried about the 2mm difference between the pedal spacing that this creates then you can add 2mm of spacers between the left pedal and the crank or offset the cleats on your shoes slightly, or you can not worry about the 2mm difference.
Fortunately, Shimano are about to finally release a crankset and front derailleur that should make this far easier. In the new GRX group there is a 46-30 crankset that has a slightly wider chainline than their regular road cranks and a corresponding front derailleur that should be able to get lower down and further out to allow for perfect shifting. I’ve ordered all of those parts, but they are not available until maybe July 2019, so I’ll write more once I have direct experience.