Before an ultra-distance bike ride, you should prepare your bike by checking that each piece of your bike is ready to last the distance, which often means replacing parts that wear out with usage. You should do this with enough time before the event so that you can do a few rides to check everything.
Page Contents:
Some tasks described below may be beyond your knowledge or skill level, so you it may be better to pay your local bike shop to do them for you. GCN covered the main points of preparing your bike in the video below (and also this video), most of which is covered in more detail below with more of a focus on bikepacking events.
Tires & Tubes
Punctures are the most common mechanical problem encountered, so start with new or almost new tires, particularly the rear tire because they tend to only last about 3,000 to 6,000 km. Factors that are important when choosing tire models are covered on the Tire Rolling Resistance page.
Drivetrain
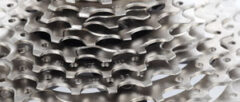
Road bike chains typically last between about 3,000 and 8,000 km. Worn-out chains can significantly reduce Drivetrain Efficiency and may be more likely to break, so it’s best to start with a relatively new chain (see this Park Tool article on how to install a chain). Occasionally, it may also be necessary to change the cassette or chainrings when replacing a chain if the new chain skips on old worn-out teeth.
Shifters & Derailleurs
Derailleur cables can break, so make sure that yours are in good condition, particularly the section that is hidden inside the lever that is prone to fraying apart due to repeated twisting. Also check that your derailleurs are well adjusted (see the Park Tool articles on front derailleur and rear derailleur adjustment) including your derailleur hanger being properly aligned (see this Park Tool article). If you have Electronic Derailleurs then don’t forget to charge the battery(s).
Brakes
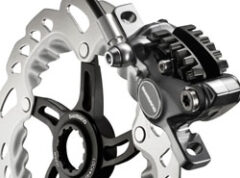
Brake pads can wear out quickly if there is some rain in the mountains, so start with reasonably new brake pads whose positions are well-adjusted to your rims/discs. Also make sure that your rims or disc rotors are not worn out and are true (see the Park Tool articles for rims and disc rotors). There shouldn’t be any excess friction in mechanical brake cables, so change them if needed. Hydraulic hoses should be free of air bubbles and the system bled if the levers feel too soft. The pros and cons of different brake types are discussed on the Brakes page.
Bearings
Worn-out, poorly adjusted, or dry bearings can cause efficiency losses and component damage (see the Mechanical Resistance page), so check that all bearings are in good condition and well adjusted, including the bottom bracket, pedals, wheel hubs, headset, and derailleur pulleys.
Handlebar Tape
Nerve damage in the hands is a common problem (see the Hand Comfort: Handlebars, Aerobars & Gloves page). Starting the race with a new wrap of your preferred bar tape is therefore a good idea (see this Park Tool article).
Bolts
Make sure that all bolts are tightened appropriately. A torque wrench, Loctite and/or lock-nuts are sometimes appropriate due to bolts and/or threaded inserts on modern parts often being made of softer materials than they used to be and the components being attached are becoming less tolerant of overtightening (so that a few grams can be saved). Remember that bolt torque values shown on components are the maximum values, which it’s often not necessary to reach.
It’s impractical to use a torque wrench every time you touch a bolt, but you should familiarize yourself with what certain torque values feel like and understand that the force applied to a tool must be combined with the length of the tool when estimating torque. Also remember that larger bolts are generally used in places where more torque is required and smaller bolts are used in places where much less torque is needed.
Bike Transport
To get your bike to or from a race, you may need to put it in a box. Getting a hard case from the start to the finish of a one-way, self-supported race is extremely complex, so it’s normally easiest to use free cardboard boxes from a bike shop, which provide more than enough protection if the bike is packed correctly. If there are no bike shops nearby, several medium-sized boxes from the back of a grocery store plus a roll of packing tape can be used to create a reasonably strong bike box – I’ve done this several times myself without anything happening to the bike.
Transport options to the start or from the end of a ride may include planes, trains, buses, or boats. This road.cc article compares the prices for taking your bike on various European airlines in early 2017. The Seat 61 website includes information about taking a bikes from the UK to continental Europe by train or ferry and some information about taking it on trains within continental Europe. The Icebike website also has a section about bike transport experiences.
The most difficult part about packing a bike into a case or box is often removing the pedals because they can slowly tighten by pedaling. Remember that right-hand pedals have a standard thread (turn anti-clockwise to remove) and left-hand pedals are reverse-threaded (turn clockwise to remove). Removing pedals to get the bike home can be particularly difficult because you don’t have a tool that gives enough leverage. Alternatively, you can remove many modern cranksets with integrated axles far easier than you can remove the pedals, so I now remove my entire crank with the pedals still attached (see this Park Tool article on how to remove many types of cranksets).
You can protect the rear derailleur and derailleur hanger during transport slightly better by removing the derailleur from the bike. If you have an electronic derailleur and a chain with a quick link then you can easily unplug it and disconnect the chain to remove the whole derailleur from the bike without losing any adjustments, or alternatively you can leave the cable connected and chain installed and tape the rear derailleur to the chain-stay.
See this Park Tool article for further information on packing your bike for travel. The following GCN video also covers the topic quite well, but, I would differ from the method they show by recommending leaving your rear wheel in the frame if the box is big enough because it protects your rear triangle and wheel dropouts, and keeps everything narrower to fit in most boxes better. Finally, airport security generally won’t allow you to take CO2 cannisters in either your checked or carry-on luggage, so you should either only use a manual pump or buy the cartridges after you land.
Last significant page update: November, 2016
This page is in the Bike Maintenance section. The next page in this section is: